How to Make a Leather Knife Sheath at Home to Protect Your Blade
Jun 13th 2019
There are a slew of reasons and uses for a leather sheath. Maybe you’re a widget collector and, along with knives, have all-in-one tools or pens and pencils to keep at your side. Perhaps you’ve been craving a new hobby, one that lets you use your hands and make something useful.
Making a leather sheath at home provides you with something useful—a sheath to protect your blade—and a new skill. With the right materials and tools, and a simple step-by-step process, you can easily create a handsome new accessory for your knife, customized specifically for you.
Fixed blades need a sheath or some other covering to protect the blades and those around you. If you’d like to make a leather sheath at home to protect your knife, here’s what you need to do.
Basics of Leather-Working
First, it’s essential to get a good understanding of the tenets of leather-working. This hobby entails creating things out of leather, working designs, images, or words onto leather or tanning the hides.
Browse Our Collection of Microtech Fixed Blade Knives
There are three essential aspects of leather-working, an intriguing pastime that results in useful tools: materials, tools and process.
The Material Matters
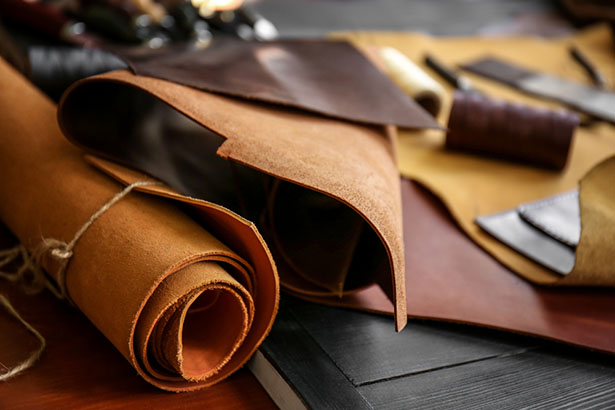
The term leather refers to many kinds of hides, from python to ostrich. The most common is bovine or cowhide. There are two sides of the hide, the finished side and the suede side, which was initially attached to the animal.
An untreated type of leather you’ll find at specialty shops or hobby stores is called veg-tan. This hide is tanned—the process of treating a hide so it doesn’t decompose (and stink!)—but not finished.
Originally, people used to tan hides utilizing a mixture of salt, brains, and urine, but these days we use a (thankfully) synthetic version made of vegetables which is where the “veg” part of “veg-tan” comes from.
Veg-tan leather is stiff and usually laid out or folded when you see it displayed for sale. You can dye it whatever color you like or stamp it; veg-tan is very customizable. It is also sold by weight, which does not refer to how heavy the leather is but its thickness. The thinnest leather has the lowest numbers.
Finished leather is much more supple, although buffalo hide is the stiffest of all the finished leathers. Finished leather has a deeper hue and higher gloss. The finishing process includes dyeing the leather to a specific shade. Chromium is used to finish the leather, so finished leather is often referred to as chrome-tanned or chromed.
You can’t stamp or tool finished leather in the same way you would veg-tan leather. Much like a shellac or wood finish, the finishing process seals the hide, making it waterproof.
Types of Leather Sheaths
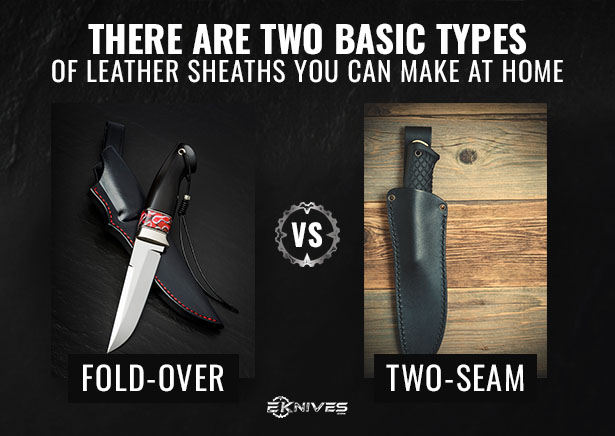
There are two basic types of leather sheaths you can make at home. There is the fold-over or pouch-style sheath, which only uses one kind of leather, and then there’s the two-seam style.
The fold-over style of sheath only uses one piece of leather which is, as the name implies, folded over itself and sewn along the sides. The two-seam type takes two pieces of leather, lays them on top of one another, and stitches along both sides.
Check Out Our Collection of Microtech Knives
.ctaBtn {background:#000;color:#fff;display:table;margin:0 auto;padding:20px;font-weight:700;border:1px solid #000;text-align:center;text-decoration:none;}.ctaBtn:hover {background:#fff;color:#000;}
The most straightforward design, and the best for beginners, is the fold-over pouch style.
Tools to Make Leather Sheaths
You need a few tools you should be able to find around the house and a few specialty leather-working tools to create a leather sheath for your knife at home. Essential tools you can find around the house are a needle and durable thread, a ruler, glue, diamond chisels, a knife, and a hammer.
You can use any pocket knife, but a Microtech fixed blade works best because it is sharp, strong, and reliable. Some of the more specialized tools you may need to make a leather sheath include:
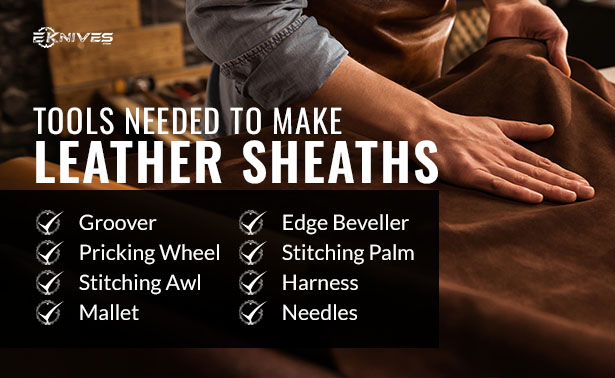
- Groover – This tool marks where you should stitch and makes a groove to put your stitches.
- Pricking Wheel – This particular tool is used to mark stitches along a curved line—like around the sheath’s tip.
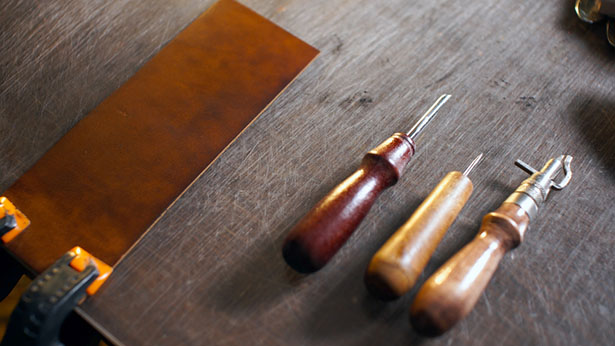
- Stitching Awl – Use this tool to make holes through which you run your waxed thread when putting it all together.
- Mallet – This tool can be used instead of a hammer.
- Edge Beveller – Used to remove sharp corners on leather crafts, resulting in rounded edges.
- Stitching Palm – This is great for your comfort while you’re sewing. Using the metal insert, you push the needle through the leather with your palm (covered by the tool) to avoid sore fingers.
- Harness Needles – Sturdy and straight, these needles have round points to save your fingertips.
- Waxed Thread – For leather-working, a waxed thread is more durable, slides through leather easily, and is waterproof.
Additional tools specific to the task of making a leather sheath for your Microtech knives at home include leather cement, a burnisher, edge cote, and dye. You may also want masking tape, neatsfoot oil, a dish towel, and some spring clips.
As for the leather, look for trimmed, premium, double-shoulder leather with a weight of 6 to 10 ounces. That is a wide range of weights—which refers to the thickness of the material, not the actual physical weight—but, after making a few sheaths, you can figure out what your favorite weight to work with is. You can find a full assortment of choices when you order wholesale leather online.
Step 1: Creating a Template
The first step to making a leather sheath is to create a template on stiff paper. Some people use cardboard, graph paper, or old file folders. To trace your knife onto your template, find the paper’s center and draw a straight line through it. This line represents the fold of your sheath.
Place your knife’s spine on this centerline with the sharp edge facing away. Trace the sharpened edge, leaving ⅛” all around and a little more for the handle. Since your handle is the thickest part of your knife, you need more leather to enclose it fully.
To create the welt outline, you should draw another line, ⅝” away from your first contour lines. A welt is another piece of leather sewn into your sheath to keep the blade from cutting through the sheath. Most fixed blade knives with sheaths have welts to prevent injury. Knife-related injuries in the U.S. outnumber any other tool-related damages, so extra precautions are a must.
The belt loop is the leather piece that wraps around to the other side of the sheath so the belt can pass through the created loop. Once you’ve outlined your whole knife, extend a piece about 4½” long from the belt loop’s centerline.
To cut out your pattern, fold the paper along the centerline and cut out the left side, stopping at the centerline. Fold it over again and cut along the right side, doubling the pattern to fold over the blade easily. Note that the belt loop should only appear on one side of the sheath.
Step 2: Transferring the Design onto the Leather
One of the most critical steps after cutting out your template is to mark the paper template which is inside and outside. Place your template, with the inside on the leather, and cut out the design. Trace the pattern onto the inside of the leather as well, which is the fuzzier suede side.
Some use leather shears, a hole puncher, or an excellent knife to cut out the template. Others use an Exacto-knife or a rotary cutter. Ensure whatever knife you use is very sharp; if you need to know how to sharpen a pocket knife, it is a quick and straightforward process.
If you feel like the template is sliding around too much on the leather during the transference, use masking tape to keep the template in place.
You also have to determine whether you want to wear your sheath on your body’s right or left side. If your dominant hand is your right one, you will probably wear the sheath on that side. For a sheath you wear on the right side, keep the belt loop on the right; if you wear your sheath on the left-hand side, position it on the left.
Step 3: Dyeing the Leather, Checking the Fit, and Molding It into a Husk
Once you have cut out the shape from the leather, you need to check that the sheath fits around your Microtech fixed blade before you put any more time or effort into it. This is also the stage where you can dye your leather if you plan to change the color.
To ensure the fit of your sheath is precise, place the knife onto the leather and fold the material over the blade. This is also an excellent opportunity to start molding your knife.
To mold it, soak the blade part of your sheath, leaving the handle out, in a pan of warm water for a few minutes. The leather immediately changes color and may even bubble a bit; this is normal.
Leave the leather soaking for five minutes, and then take it out and discard the water. Place a dish towel over the wet leather and press so the cloth absorbs all the excess water. Wrap your knife in plastic wrap to protect it from the damp leather.
Once the leather is damp, not wet, place your plastic-covered knife on it, lining up the edges so it fits as it should in the final product. Fold the leather over the blade and secure along the edges with spring clips. You can leave your knife like this from one to twelve hours, checking every so often that the leather is molding to your blade’s exact shape.
After the allotted time has passed and the leather is dry, remove the spring clips and the knife, and you’ll be left with a sheath husk.
Step 4: Trimming and Stitching the Leather
Break out the rotary cutter, which helps cut rounded edges, and trim off any rough or uneven edges. Cutting this time around is demanding because you are now cutting through two layers of leather that have been hardened by the wetting and drying process. Go slow and be careful.
First, stitch up the belt loop by flipping it over so the edge is just below the sheath’s opening. Using an awl or similar tool, make a series of holes—around four to five—in the belt loop and the sheath. When stitching hardened leather, it is much easier to make the hole and then guide the waxed thread through it, although harness needles and stitching palms make it easier if you would like to combine the steps.
Starting at the sheath’s tip where the knifepoint will be, use a single- or double-needle technique to seal that side of your sheath. Once you’ve reached the top, turn around and go back the way you came, using the same thread. This creates an extra-durable seam that does not unravel.
Once you’ve stitched everything up, use some finishing stitches to make sure nothing pulls through and tie them off as close to the leather as possible.
Step 5: Burnishing the Sheath and Fitting the Knife
After you’ve finished stitching up your sheath, push your knife into it to check the fit. It should be snug, but the sheath will loosen up with time and wear.
With the knife inserted into the sheath, use an antler to burnish the sheath’s edges, which wears them down to rounded edges.
The Last Word
It is incredibly satisfying to make something you can use time and again. Every time you sheath or unsheath your Microtech knife, you’ll be reminded that you created the accessory by hand.
A fixed Microtech blade in a homemade sheath is a beautiful, personalized gift, and it keeps you safe from accidents. With a few specialized tools like an awl and a stitching palm, some time, quality leather, and a sharp knife, you can create a leather sheath for your favorite blade in the comfort of your own home.
While crafting your sheath is fun and rewarding, if you want to order a Microtech fixed blade that comes with a sheath, there are dozens of options to choose from on our website.

